How Can We Help?
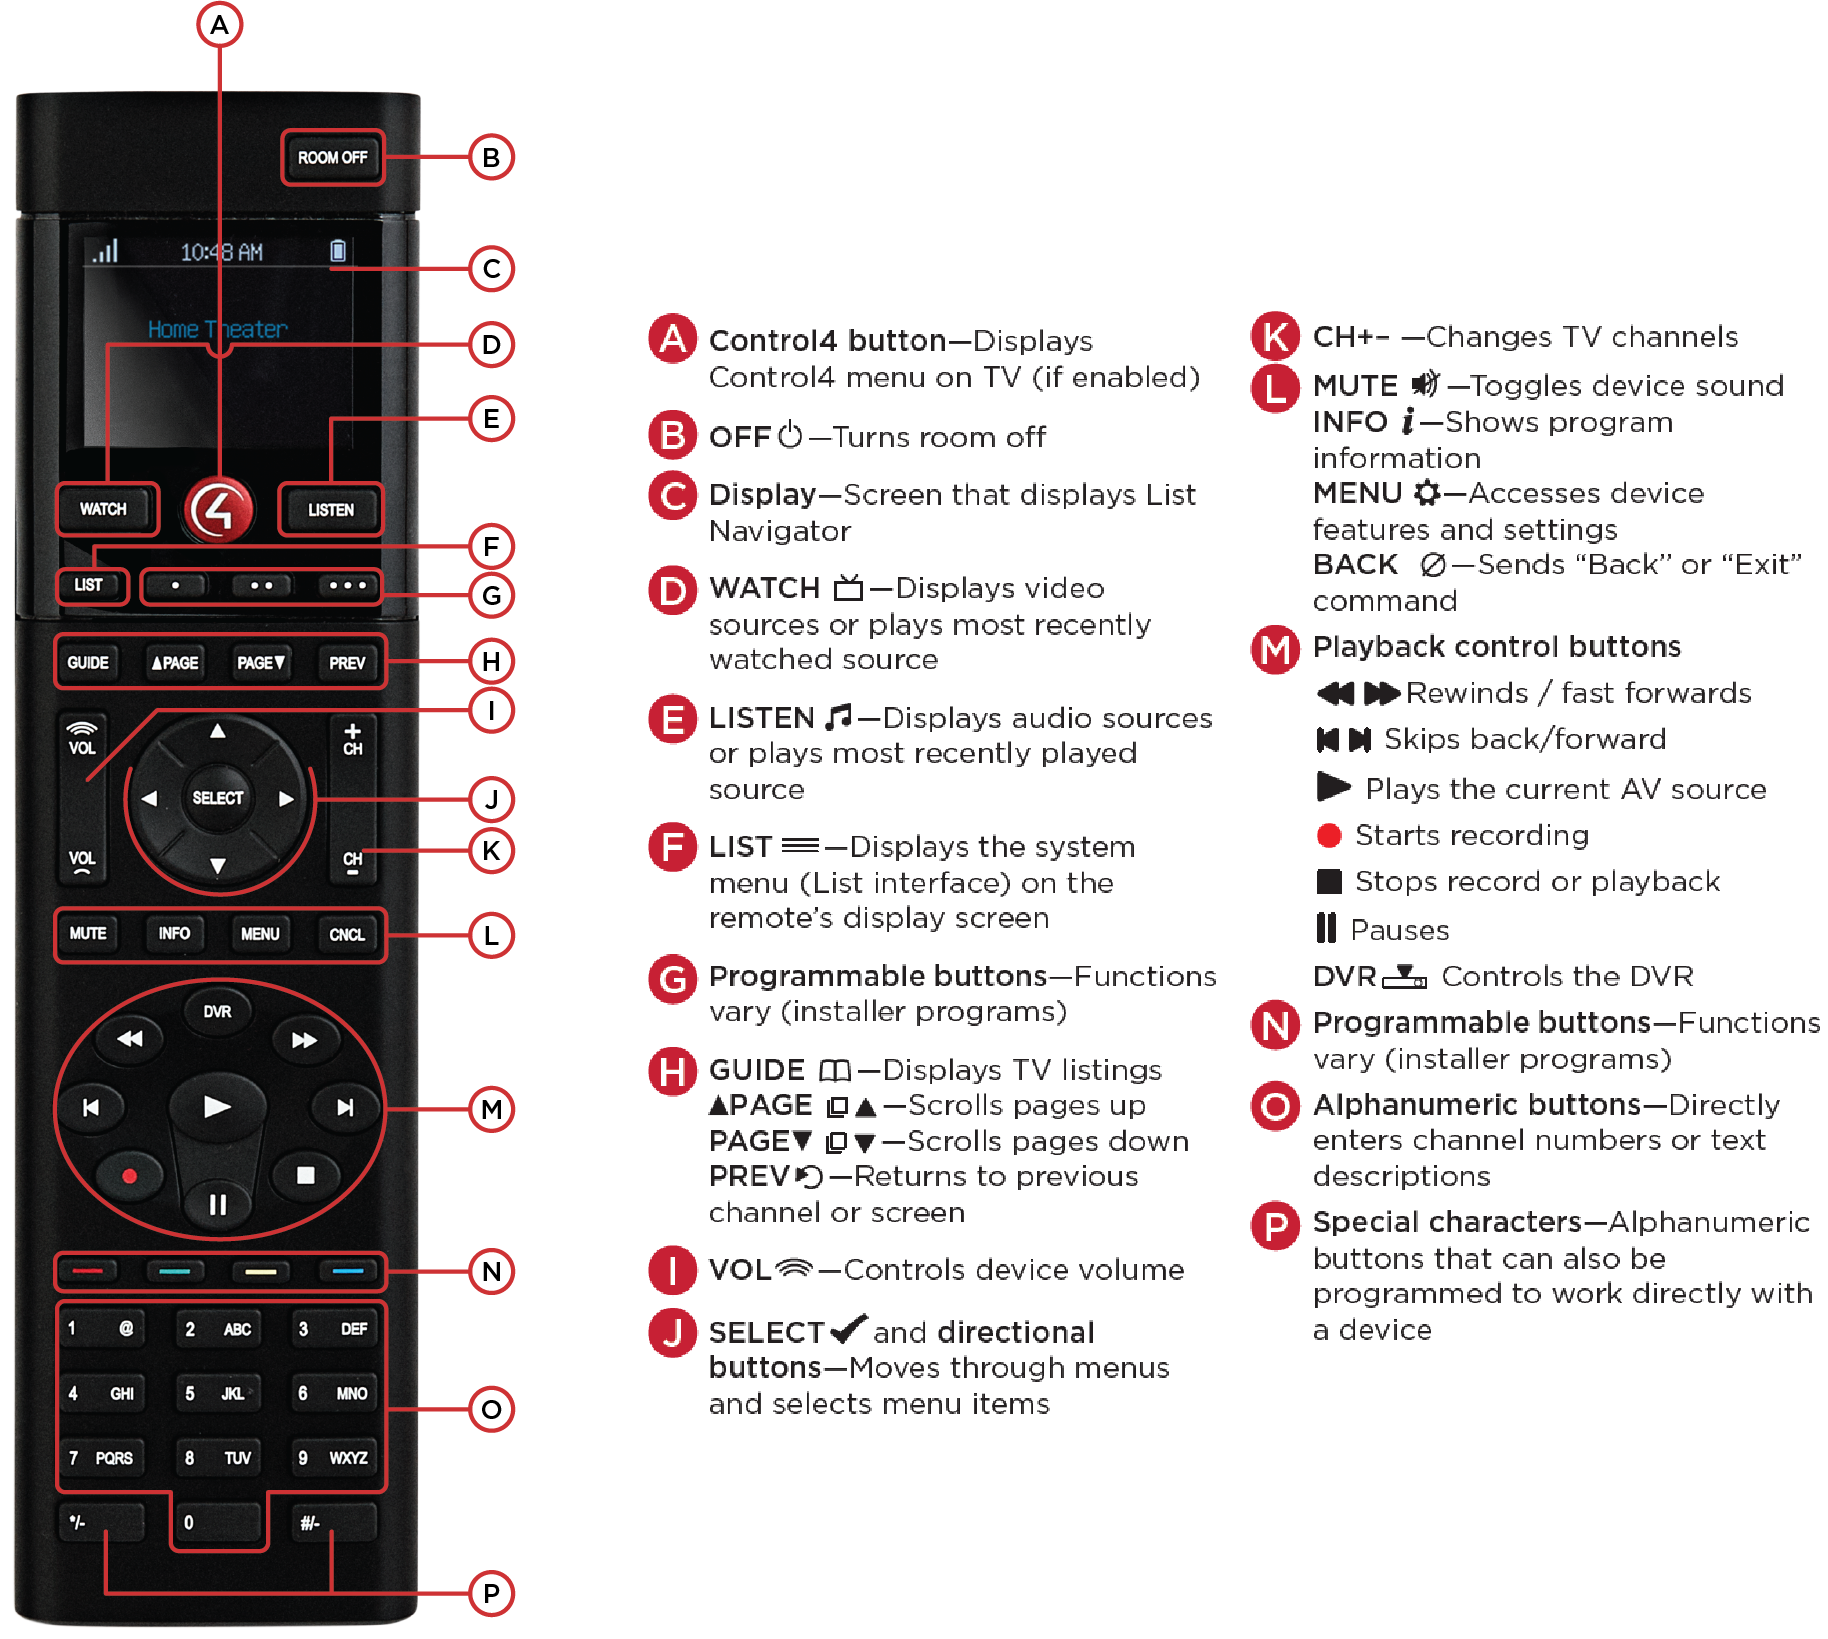
SR-260 Remote (button layout and function, using the List button and navigating for control)
Your handheld remote is laid out in an intuitive fashion and is easily customizable.
Watch:
If you want to watch something simply press the watch button to see your selections. Use the navigation buttons below to highlight your selection, then press the select button. Your system will automatically turn on and switch to that source. The buttons on the remote will now control all the functions of the source you’ve chosen.
Listen:
The Listen button works in the same way as Watch. When you are ready to listen to something press the listen button. You will see your choices populate on screen. Navigate to make your selection.
Room Off:
When you are done using the system, simply press the Room Off button to turn off all Components associated with that room.
In the off position the remote’s screen will only show the room’s name. If you only see the room’s name, the system thinks all components are currently off. When you turn something on by pressing the watch or listen button, you will then see the room’s name followed by the source’s name directly below.
Sometimes one of the system components may get out of sync. You will press watch, make a selection and some components have come on but possibly a cable box or TV may not have. Looking at the remote screen can help you diagnose the problem. If the remote displays the room’s name and the source’s name but you don’t have a picture or sound then most of the components have come on and one or more is out of sync. In this scenario you would manually inspect the components to determine if they are on or not. If any component is off you would manually turn them on, with the power button or with the original remote. You may see this happen with cable boxes, surround receivers, and sometimes televisions.
If some components are verifiably on, but the remote shows only the room’s name, then the system thinks all the components are currently off. In this scenario you would manually turn off each component, returning the system to an in-sync state.

Changing Rooms:
You can easily change the room your remote will control. By changing rooms on the remote you will now be able to control all the audio/video and lighting functions within that room. Simply press the “List” button near the top of the remote, press the up arrow on the navigation keypad to highlight the room name, then press select. You will then see all the rooms available and can scroll to the room you want. Once highlighted press the select button once and then again to lock in your choice. This is also how you can make a room part of the Quick Select option.
When you select into a room you will also see the option for Quick Select. If there is a check mark, then that room will show up in the Quick Select menu. You access the Quick Select Menu by pressing the “List” button, then Up to highlight the room name and then Left or Right to scroll through the Quick Select Rooms. When your room if found, simply press watch or listen to control, or the cancel button to exit out of the menu screen and into your newly selected room. This can be useful if you find yourself moving between different rooms often.
Pressing the List button will also gain you access to control your Lighting, Comfort, Custom Buttons or Remote Control Settings.
